What Happens During a Leak Detection Inspection?
You Booked an Inspection. Now What?
Most homeowners who call for a leak detection inspection have never had one before. They know something is wrong, the water bill is too high or there is a wet spot somewhere it should not be, but they do not know what actually happens when the technician shows up.
This is a common question. And it is a fair one. You are letting someone into your home to look for a problem you cannot see. Knowing what to expect makes the whole thing less stressful and helps you get more out of the visit.
Here is exactly what happens during a leak detection inspection, from the time the technician arrives to the moment they give you their findings.
Before the Technician Arrives: What You Should Do
A few things before the inspection will help the technician work faster and give you more accurate results.
First, note down everything you have noticed. When did you first see the wet spot? Where exactly is it? Has your water bill gone up? Do you hear running water at certain times? Even small details help the technician narrow down where to start.
Second, make sure the water is on and working normally. The technician needs water pressure to test the lines. Do not shut anything off before they arrive unless they specifically asked you to.
Third, clear access to your meter box, any exposed plumbing areas (under sinks, around the water heater), and your crawl space or basement if you have one. The less the technician has to move around furniture or open stuck doors, the faster the inspection goes.
Step 1: The Initial Walkthrough and Questions
When the technician arrives, the first thing they do is talk to you. They will ask where you noticed the problem, how long it has been going on, whether you have had any recent plumbing work done, and whether you have noticed anything else unusual, like a musty smell, cracks in the floor, or soft spots in the wall.
This conversation usually takes five to ten minutes. It is not just small talk. The information you give shapes where the technician starts looking and what tools they prioritize. A homeowner who says the hot water seems to run out faster than usual, for example, points the technician toward the hot water supply lines. A homeowner who mentions the water bill went up $60 last month with no change in usage points toward a continuous running leak rather than a slow drip.
After the conversation, the technician does a visual walkthrough of the areas most likely to be affected. They look for visible signs of water: stains, soft spots, mold growth, peeling paint, warped floors, and similar clues. They also check the water meter to confirm whether water is actively moving while nothing is running in the house.
Step 2: The Water Meter Check
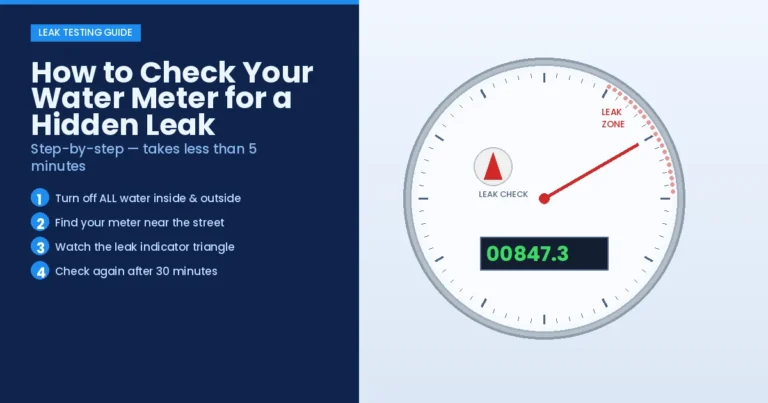
Checking the meter is one of the first technical steps. The technician turns off all water inside and outside the home, then goes to the meter. If the leak indicator (a small triangle or dial) is still spinning, water is moving through the supply system somewhere.
The meter check tells the technician two things: whether there is definitely a leak and whether it is likely on the supply side (the pressurized lines coming into the house) or the drain side (which the meter does not measure directly).
If the meter shows no movement, the leak might be intermittent, very slow, or on the drain side. The technician will continue the inspection either way, but the meter reading is an important early data point.
Step 3: Acoustic Listening
Acoustic detection is the core of a professional leak detection inspection. This is where the specialized equipment comes in.
The technician uses a listening device that amplifies the sound of water escaping a pressurized pipe. The device has a ground probe or contact sensor that is placed against floors, walls, and concrete surfaces. Water escaping through a crack in a pipe makes a distinctive sound as it moves through the surrounding material. Trained ears with amplified equipment can pick up that sound through several inches of concrete or a foot of soil.
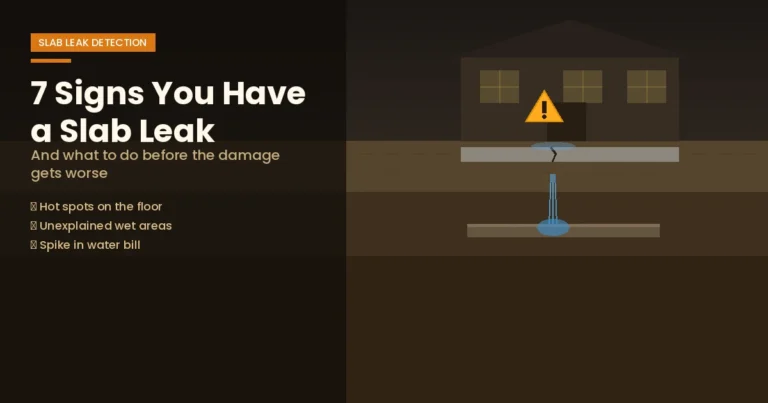
The technician moves systematically through the likely areas. For a suspected slab leak, they work across the floor in a grid pattern, listening at regular intervals. When the sound gets louder, they are getting closer. They narrow it down until they can pinpoint the leak within a few inches.
This process takes time. A simple inspection in a smaller home might take 45 minutes of acoustic work. A larger home with more pipe runs can take longer. If the leak is very small or the pipe is deep, detection may take longer as well.
Step 4: Thermal Imaging (When Used)
For hot water line leaks, a thermal imaging camera is a powerful complement to acoustic detection. The camera shows temperature differences on surfaces. A hot water pipe leaking under a slab heats the concrete above it. On the thermal image, that shows up as a warmer zone on the floor, often in the shape of the pipe path.
Thermal imaging does not work for cold water lines in the same way. Cold water lines are closer to the surrounding soil temperature, so the contrast is lower. But for hot water supply lines, the combination of acoustic detection and thermal imaging gives the technician two independent ways to confirm the location before anything is cut or opened.
Not every inspection uses thermal imaging. It depends on the suspected type of leak and what the acoustic results show. Some companies include it as part of the standard inspection. Others bring it in when acoustic detection points to a hot water line issue.
Step 5: Pressure Testing the Lines
In some inspections, the technician will pressure test individual pipe sections. This involves isolating a section of pipe, pressurizing it, and watching whether it holds pressure over time. If the pressure drops, that section has a leak somewhere along its length.
Pressure testing is especially useful for underground supply lines, irrigation systems, and pool plumbing where acoustic detection alone can be harder. It narrows down which section of pipe is leaking before the technician moves on to finding the exact spot within that section.
Step 6: The Report and Findings
At the end of the inspection, the technician gives you their findings. This typically includes:
- Whether a leak was confirmed
- The location of the leak as precisely as they found it
- What type of leak it appears to be (supply line, drain line, slab, wall)
- What the repair options are
- An estimate or recommendation for next steps
A good leak detection report is specific. You should walk away knowing exactly where the problem is and what needs to happen to fix it. Vague answers like there might be a leak somewhere near the bathroom are not useful and are a sign the inspection was not thorough enough.
If the leak is in a slab, the technician should be able to tell you within a foot or two where the access point for repair should be. That precision matters because slab repairs require cutting into concrete, and cutting in the wrong spot wastes time and money.
How Long Does a Leak Detection Inspection Take?
Most residential inspections take between one and three hours. The range depends on the size of the home, how many pipe systems are involved, and how quickly the leak is found.
Simple cases where the meter is clearly running and the acoustic signal is strong can be resolved in under an hour. More complex situations where multiple areas need to be tested, or where the leak is very small or deep, can take longer.
Commercial inspections and multi-unit buildings generally take longer because there are more pipe runs, more fixtures, and more potential leak points to evaluate systematically.
What If the Technician Cannot Find the Leak?
This is rare but it happens. Sometimes a leak is intermittent, meaning it only shows when conditions are right, such as when water pressure spikes or when the temperature changes. Sometimes a leak is very slow and the acoustic signal is too faint to pinpoint with standard equipment.
In these cases, a good technician will tell you honestly what they found and what they did not find. They may recommend a follow-up visit, a different type of testing, or monitoring the meter over a specific period to gather more data.
What they should not do is guess at a repair location and suggest cutting into the slab or wall without a confirmed leak location. That wastes your money and creates new repair work without solving the actual problem.
What Happens After the Inspection?
The inspection itself does not include repairs. The technician finds the leak. Repair is a separate step and, depending on the type of leak, may involve a plumber, a slab repair specialist, or a pipe lining service.
Having the leak location confirmed before starting repairs saves significant money. A plumber who knows exactly where the slab leak is can cut a small, precise access point and make the repair cleanly. A plumber working without that information has to guess and may open up a much larger area.
Most homeowners are surprised at how much the inspection itself is worth just for the information it provides. Going into a repair knowing exactly what is wrong and where it is changes the whole dynamic of the job.
What to Ask the Technician Before They Leave
Before the inspection is over, make sure you get answers to these questions:
- Where exactly is the leak located? Can you mark it on the floor or wall?
- What type of pipe is leaking and is this likely to happen again nearby?
- Is this a supply line or drain line?
- What are my repair options and what are the trade-offs?
- How urgent is the repair? Is this something I can schedule next week or does it need to happen today?
- Is there any other area of concern I should have a plumber look at while they are here?
A technician who has done a thorough job should be able to answer all of these questions clearly. If the answers are vague, press for specifics before they leave.
The Bottom Line
A leak detection inspection is a methodical process that starts with a conversation, moves through acoustic and sometimes thermal testing, and ends with a clear report of what was found and where. It typically takes one to three hours for a Portland area home. When done properly, it gives you the information you need to get the right repair done in the right place, without tearing apart walls or floors looking for something that could have been found with the right tools in the first place.